Sunday, December 15, 2013

Foam Christmas Tree and Snowmen Fun!

Our early December has brought quite a few chilly, rainy days so I was very thankful when I came across this post from Fun at Home with Kids. 

All you need for this incredible, reusable activity is "special glue" (water), foam pieces and a window (or mirror)! 

When I find things like this online I always have the same thoughts:
1. This is GENIUS!  Which is always followed by...
2. WHY have I never thought of this?!?! haha! 

We play with foam letters in the bathtub all the time so this makes complete sense! 

We decided to go with Christmas tree decorating and save the snowmen fun for January. I started with cutting out small, medium and large size trees with corresponding stars.  I'm so grateful for the large random bag of multicolored shapes I saved from my teaching days. They worked their way perfectly into this activity as ornaments. My obsessive compulsiveness may have kept me up all night cutting foam "ornaments" for decorating our foam trees. I won't tell you how many times I erased the penciled sketches from attempt after attempt in drawing three decent looking stars.  :/

Gabriella was right alongside of me "helping" as she cut her happy little heart away. (Cutting foam is really rather soothing. Well, at least Gabriella and I think so :)) I LOVED when she realized some of the scraps from her cutting were squares and rectangles that would serve perfectly as presents under the trees! She also did an incredible job cutting out three different size candy canes for decorating. It was challenging but she was rewarded with pure joy when she accomplished it. 

When it was time to play I laid out two white tubs, one to hold the pieces and the other to hold a small amount of "special glue" (water) for sticking the foam to the window. 

My little love bugs would pick up a piece, lay it in the glue then place it on the window. So easy and so fun! I did place a towel under the play area for two reasons; the floor was cold due to the weather out and I have a two year old, haha! Even if it was only a 1/4th of a cup of water, I didn't expect any of it to remain after my Mikey got a hold of it. :) 

We also experimented with using paintbrushes to paint the "glue" on the window.  I think we all liked that a bit better than the water tub. There's just something about holding a paintbrush in your hand that makes you feel like your doing something extra special.  

I really loved all the learning I got to sneak in with this activity while they played. 


We talked about the size of the trees and the relationship between them. 
We also worked on following verbal directions like,
"Place a yellow circle on the largest tree"
"Place two presents under the medium size tree" 
We even got a chance to reinforce directional terms like,
"Place the star on top of the tree"
"Place the ornament under, beside, to the right, to the left"

We used the trees to help sort shapes as we talked about their attributes. 


It wasn't until a day or two into playing with this activity that I realized we could utilize the window clings on my window. (We found then at my favorite store, The Dollar Tree)! I was actually busy trying to get them out from behind the trees (honistely, it wasn't bothering anyone but me) when it dawned on me...we can use these! So we did. :) 

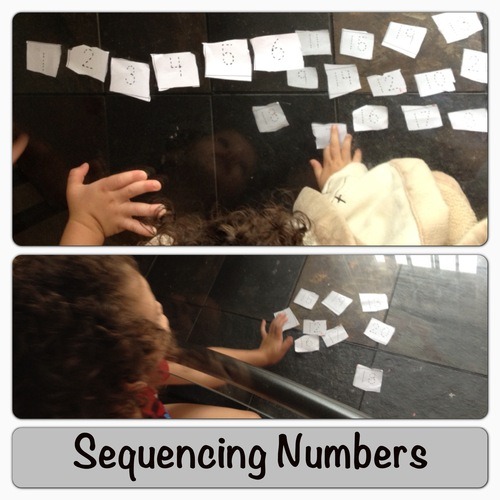
With a little color sorting and graphing...


Then with number representation and counting...


We really have enjoyed decorating our foam trees. I think what I love most about this activity is that I'm not being wasteful. I can pack them up and save them for next Christmas. Definitely a win! 

Merry Christmas to all of you! May your holiday season be filled with God's love and peace and may we never forget the real meaning of Christmas...Jesus. 

Updated January 2014

Look how sweet our little snowmen turned out! 


Gabriella had such a great time helping me with them. We decided to work on them while the boys napped and surprisingly, we finished before they woke AND had a little time to play!!! Yay!

We followed the same concept we had with the foam Christmas trees; one small, one medium and one large. I decided to number the three circle body parts of each snowman to make it a bit easier when putting them together. I used a pencil to write the number 1 on each of the "large" snowman's body parts, 2s on the "medium" snowman's body parts and 3s for the "small". I also used a black permanent marker to drawl the coal smile onto each snowman's face.

The boys had a great time playing around with them too! 


Oh Josiah! He always goes straight for the unattended cup with "special glue"! He gets such a kick out of playing with the very small amount of water in there!   

I'm excited for all the future opportunities to create new foam window art. Maybe we'll try big raindrops and umbrellas for April and a little flower garden for May! Can't wait to see what we come up with. I'll keep you updated with pictures! :) 


Wednesday, November 27, 2013

Our Thankful Tree

Gratitude. What a tremendously important lesson to teach little ones. 

This is only the second year we've made our "thankful tree" but I hope to make it a lasting tradition. 

We like to take a trip to the park and hunt for the perfect twigs for our tree and this year it was as though they were just waiting for us! I can't get over how beautiful they are. As for the leaves, last year I hand cut them from yellow, red and orange construction paper (not so much fun) but this year I came across the prettiest bag of them at the dollar store. Whoo-hoo for a time saver! I am so thankful for the Dollar Tree! :) 

We usually add a few leaves to the tree each morning during our breakfast and devotion time but recently Gabriella will randomly ask me throughout the day to add things like,

...while she's walking through the house humming she'll excitedly say "mommy, I have something we can add to our tree, MUSIC!!!"

...after waving to our neighbors across the street she'll come close and whisper "let's add our neighbors to our tree Mommy" (they really are wonderful neighbors, we are so thankful)

...or my favorite, just the other night after dinner, Gabriella says "Oh mommy, mommy! I have something to add to our thankful tree!!!....I'm thankful for Jesus of the Christ" Yes, Jesus of the Christ. I had to ask her twice too. Haha! It was just as precious as it sounds! That would be the 4th time we've added Jesus to our tree but really, could we ever be thankful enough for him? {big sigh} 

And I just can't leave out Mikey. Although he may not understand completely, every time we talk about what we are thankful for he blurts out "and mommy and daddy and Gabby and Mikey and Siah (Josiah)". Oh how I love his adorable two year old self!  

So I think Gabriella's got it...I think she's found her heart of gratitude and my Mikey is well on his way...for that, I am so thankful.


Although there has been a lot of talk in our home recently about being thankful, I don't think our "tree" or our talks are most efficient in teaching it. I do hope the deliberate discussion and act of writing down what we're thankful for is helpful but what I really long for is that my little loves catch ME "teaching them" gratitude...teaching them daily as they hear me say grace, thank a stranger for holding a door open, Josiah for his sweet cuddles, Mikey for his tender kisses and Gabriella for her companionship. I pray they catch me thanking God for patience, for the birds singing and the sun shining. I pray they hear gratitude during bedtime prayers as we thank God for the day's blessings and thank him for carrying us through. I pray they soak up God's favor and thank Him for every special gift. I pray they learn to be truly grateful... knowing that if it weren't for HIM, we'd have NOTHING. My prayer is that I lead by example. Let it be I who sets gratitude into action.

Saturday, November 23, 2013

Discovery Jars

Discovering our Discovery Jars!

This would be another one of those things I have been SUPER, super excited about getting together. It's the kind of excitement where you can't stop thinking about it until the project is complete then want to sit and stare at it for HOURS and hours once it is. I have to admit I've been drooling over the Discovery Bottles I've seen all over the web. I first saw them on one of my favorite blogs, Fun at Home with Kids and immediately fell in love. You can check out her post here, Discovery Bottles. They not only provide for hours of fun but are incredibly beautiful too!  I've been trying reeeaally hard to be patient until I could collect or find the right "bottles" to make it work for us. I started saving our plastic peanut butter jars but even with the kiddos' intense love for peanut butter only sandwiches, it was taking much longer than I anticipated. 

I didn't initially envision having jars/canisters this size but they couldn't be more perfect for our family.  I found these beauties at the Dollar Tree and that, of course, makes them even more perfect! Because I hesitated on the size, I regretfully only bought two at first then was left searching Dollar Tree Stores for DAYS looking for more!! I was on a desperate mission to bring the vision to pass.  When I finally found them I sent hubby to get enough to complete my set and maybe just a few more. ;) 

In a very perfect world I'd love to say we took the time to find each item for the jars together but given the ages of my lil ones and time management, it just wasn't fesable. It would have taken days, weeks, MONTHS, maybe even an entire year to complete our set that way! Haha! It was easier for me to do the hunting for the items alone. I did however, really want the kids to have a sense of ownership and pride in our Discovery Jars.  I didn't want them to miss out on all the fun of discovering the objects so placing everything in a bin for us to sort into the jars together worked perfectly! And of course, anytime they find an additional item that we can add, we most definitely do! :) 

I love the fact that we call these our "Discovery Jars".  Every single time we play with them we discover a new way to explore the items as learning takes place and THAT could not possibly make this Momma's heart any happier. One of the reasons I love having jars this size is because the items inside are large enough for us to take out on a regular basis and explore. I even tried to stay away from including super tiny items that our littlest wouldn't be able to resist putting in his mouth just so he could play with us!  The jars sit on a beautiful bookshelf that we were blessed with (thanks to my awesome Father God for always knowing the desires of my heart).  I keep a good size bin in that bookshelf so as the kiddos desire they can take down a jar or two or ALL of them, as my two year old prefers, and play, play, play! Here's some of the fun we've had while discovering our Discovering Jars. 

Open-ended play! 

This will never get old! I hope and pray that my little ones never cease to use their imagination and creativity while playing. Between all that's in these jars they should never run out of silly things to create, roll play, or just stacking jars (castles) before they come tumbling down.

Number Identification and 1:1 Counting

The kids discovered a die while playing with the contents in our green jar and we suddenly found ourselves playing a game! The jar's lid was the perfect size to both roll the die in and contain it's roll. We all took turns rolling, identify the numeral and choosing that number of objects from the bin. Wow was this a surprisingly fun, easy, and exciting game!!  They were very patient with each other while taking turns and were excited about choosing their own objects. You could easily play until you've emptied the items from the bin or if you'd like to make it competitive, you could establish a "winner" based on the most/least items retrieved. You could also pull out a few ice trays or egg cartons to have them place their collected items in. First to fill up all of their spots is the winner! Whoo-hoo so much FUN! I admit at first I hesitated placing ALL of our cute colored dice in the Discovery Jars. I didn't want them to be removed form their "very special" labeled place on the "very special" shelf. Well, all of that quickly went out the window and I grabbed every color die I could find to place in the remaining jars. Every time we pull out a jar to play with I can only hope we'll get the chance to play this game again! There is no time like NOW. Learning was taking place and that is far more important than anything "looking nice" on a shelf.

Memory Games!

My hubby and I love any opportunity we have to play memory games with the kids. Beside the fact that they are FUN, they are also sooo so good for their little brains!  I was always really intrigued by the memory lessons in my Developmental Psychology class. I have to admit though, I was never very good at the exercises. I tried REALLY hard but always disappointed myself with how few I could remember. It excites me to begin memory training really early with the kids by playing games like these. We started nice and easy with strategically placing just a few objects neatly in the bin. We took turns closing our eyes and whoever was "it" removed one object to hide behind their back. We'd open our eyes, took a look at the items and tried  to remember which one was missing. My two year old didn't quite understand the concept of this game. He was so funny when it was his turn to be "it". As soon as we were ready to guess what item was removed he'd yell out the answer. Oh! We really enjoyed that! We chuckled and chuckled and chuckled! He is seriously too cute! 

Exploring with sense of touch

I give my two year old all the credit for engaging us in this activity. He started stuffing a ball into a sock that was suppose to be on his foot, haha! (It was pretty clean, no worries ;)) A little light bulb went off in my head and we took off with his idea. Again here, we took turns choosing an object while everyone else closed their eyes then placed it into the sock (no pEEking!). It was then everyone else's job to hold the sock, feel around and try to guess what object was within. We were having WAY too much fun for us to stop so I could try to find a more appropriate "bag", Oh No, there was none more appropriate than my son's precious sock at that very moment. <3 For the record we have played this game since then and did use a larger cloth bag with a drawstring top. This gave us the chance to place our hand in the bag and feel around while guessing. It provided for a completely different sensory experience. We loved it! I should mention that it is easier for little ones to cheat using a bag, haha! I will never forget my sweet princess's face.  She tried soooo hard to keep her eyes from peeking into that bag as she slid her hand in. Oh goodness! I do have to say she gets it honestly...It's soooo hard not to peek!

Reading, Identifying and Classifying   

I have really been longing for a way to incorporate literacy into our Discovery Jar play time. I started by using a white board and writing the label of an item in the bin. My daughter would then do her best to sound out the word and find it.  Yay, it was a success!
I was then inspired to create this for her to access whenever she desired. I used little cut up pieces of construction paper and wrote labels of many (not all) items in each jar. I hot glued a magnet to the lid, used a metal clip to hold the labels and secured them right to the magnet! Oh how I felt like Tinker Bell at that moment tinkering with lost things to create something truly wonderful! I also tried to prepare for the inevitable lid mix-up when my two year old dumps multiple jars out to play with at once by writing the color name on the back of each card. This has been VERY helpful!
Ahhahah I just love all the learning that's going on with these jars!!!

The magnet on the lid also serves for another incredible purpose as we can use it to help us classify objects as magnetic or non-magnetic! Magnets are ALWAYS so much fun to play with! Here's my sweet princess showing me that the small washer on the sea turtle is magnetic.


Sorting and Classifying Objects! 

WOW to the endless possibilities for sorting and classifying with these items! The picture above shows just a few groups we came up with. I'm SO excited that we can continue to classify based on attributes like: 
  • Texture
  • Color
  • Size 
  • Weight
  • Shape (3-D)
  • Phonics
  • Magnetic and Non-Magnetic
And FINALLY... 

Beginning and/or Ending Sounds

For this activity we worked together on isolating beginning sounds and placed them on the carpet where they belonged. We quickly noticed many letters had no friends and few letters had many.  What a great way to get some mathematics vocabulary in by asking which letter has the most, fewest, more than, less than, equal to and so on. Oh geese I get so excited about learning!  We laughed about the fact that the majority of the items in the B..b..blue jar began with the letter B! 

I'm so very sorry for how long this post has been! I've been so excited about finishing it and sharing it with you in hopes that you'll find some use for them as well. We'd love for you to leave us a comment with more ideas of fun ways to play! 


Friday, November 8, 2013

Tree Leaf Collage

A visit to our favorite park in town turned out to be an opportunity to collect valuable materials for some really beautiful fall crafts! 

It just happens that the kiddos' favorite playground is surrounded with the most beautiful trees. In fact the largest of all shades every bit of the play equipment as it spreads its beautiful mature branches right overhead. {sigh!} Have I mentioned how much I LOVE fall? :) Anytime we are close to that playground they don't have to ask more than once to go! It is most definitely one of my "happy places." 

We spent the latter of our park visit crawling all over the leaf covered ground picking up, what felt like, hundreds of leaves and acorns. Every time the wind would gust it felt as though we were being showered with autumn's raindrops... what a memory! 

I can't get over how beautiful our Tree Leaf Collage turned out. I know the vibrant reds, yellows, and oranges won't stay for long but they are breathtaking while they last. My sugar and I even had a great discussion about the life span of the leaf once it has fallen to the ground. We talked about the brown crunchy leaves opposed to the bendable/flexable, colorful leaves. She decided the darkest brown leaf should be glued to the "ground" of our collage. 

It turned out perfect, I couldn't love it more! 

Wednesday, November 6, 2013

Golf Tee Pumpkin FUN!


I am MORE than excited about this activity but can I first say how grateful I am for my Father God who gives me breath, life and inspiration. I cannot live a day of this life without his strength. I am nothing without Him.  I just can't get by without saying thank you and giving all glory where its due, to my God! He is my source.  If it weren't for him I wouldn't have even remembered where I put those golf tees from a year and a half ago, haha! Thank you Jesus! 

So...are you ever WAY more excited about an activity or "learning experience" than your kiddos are? I feel like this is me more times than not, haha! I'm hoping it will level out here in the near future. ;)

I came across a picture of the golf tee pumpkin hammering activity from one of the incredible blogs I follow on Facebook (I hate that I can't remember exactly which one, I follow so many!) and immediately placed it on my mental "we MUST do this as soon as possible!!!" list.  So as soon as I found those golf tees it was ON and BOY was it FUN! 

We started with a couple hammers, small pumpkins and golf tees. What a great way to use those cute lil pumpkins we got from visiting the pumpkin patch! I think anytime you put a hammer in the hands of a child it equates to loads of FUN in their eyes.

The kiddos were super excited about hammering and got to work right away. They seemed to know exactly what to do and didn't even care to listen to directions or watch me model first, they just took off! 


I just love the picture of my lil guy holding the tee and hammering away.  It took him a bit of time to figure out exactly how to hold it just right but he figured it out and it was such a joy to watch him acquire a new skill. 


The kiddos even spent a good amount of time pulling all of the tees out and replacing them again without the hammer. 

Every bit of this activity was TONS of fun in its self but I'm so excited to share some awesome extension activities with you as well! 

I quickly followed up with making sure there were 26 tees in one of the small pumpkins then used a marker to write a single letter of the alphabet on each tee. I then cut and tied some yarn to the stem of the pumpkin (even though I didn't do so, a bit of hot glue here would be helpful) and we had our very own connect the dots/maze activity! It was such a HUGE hit! 


I wondered if the process of holding the yarn snug, wrapping each tee once and slowing releasing yarn between the finger and thumb would be too much to handle for the little ones but after a bit of practice and some help, they were so successful at doing ALL of that on their own! I did help to maneuver the pumpkin given everything else they had to focus on.  I'm not going to lie, my little ones may have even caught me a few times doing this activity alone. :)


I repeated the same concept with numbers 1-20 on the next pumpkin. 


If your little ones get really good and have even got to where they've memorized the route of the ABC or number "maze" you could simply pull the tees out and rearrange them, giving the maze a brand new feel and experience. You could even try giving them the responsibility of rearranging! They'd love that! 


The 3rd pumpkin had the fewest tees so I decided to use them for color matching.  I used permanent markers to color a pair of tees the same color. Although not necessary, I scoured through a bag of colored rubber bands to make sure I had a band that matched the colors I choose for the tees.  The colored bands added just one more opportunity for color recognition. I only wish I had more tees and could have done every color possible! :) It was so much fun watching my 2 year old use his itty bitty fingers to sssstretch those rubber bands over the matching pairs of colored tees.  

Rubber bands are SSOOO much fun to play with.  Using tees and bands with the pumpkin as a geo-board was the initial activity I've seen from others on FB and Pinterest.  You could even use them instead of the yarn on the ABC and number maze by placing the band around two tees at a time until you reach the end. (e.g. A-B, B-C, C-D or 1-2, 2-3, 3-4) 

There are SO many ways to differenciate this activity! Here's a few I've thought of with using the rubber bands to match or pair items...
     upper and lower case letters
     shapes
     shapes paired with their number of sides or angles


You could even create a key that indicated which colored rubber bands are to be used for different outcomes or answers...
     yellow band around 2 digits whose sum is 7 (e.g. 4 and 3 or 2 and 5)
     green band around 2 digits whose difference is 3 (e.g. 8 and 5 or 6 and 3) 

You could also use the yarn "maze" for skip counting practice! WOW the possibilities are truly endless! In fact, I have 3 large pumpkins sitting outside on the porch who I feel like are begging me to involve them in our learning experiences.   If I get the chance to grab another bag of tees they most definitely will join in on the fun! 

Here's just a few of the skills these activities enhance:
Fine motor skills
Practical life skills
Letter and number identification
Alphabet order
Sequencing
Multitasking and so so much more!

I'd LOVE to hear your comments and ideas for even more opportunities on how to use these incredible tees in pumpkins for FUN!


Monday, November 4, 2013

Countdowns!

I am convinced that visual countdowns for toddlers and preschoolers are magical!! My sweet as sugar 4 year old little girl is a planner much like myself and I love that! BUT lots and lots and lots of questions about days' events are asked because of it. On the RARE occasion I tell her about an exciting event weeks or even days in advance, well, I suffer! It's like an extremely long car ride with endless "are we there yet"s!  Like most moms, I've quickly learned to only share exciting plans hours or even minuets before they take place. ;) And if I do share great news weeks before hand, I now count on our countdown chains to keep track of all the "are we there yet"s for me. I'm telling you, it's magic!


Here's one we used to keep track of the days left to visit family in Alabama. My teacher heart absolutely LOVED all of the hidden opportunities the chain provided to expose my little ones to number sense. We had some great discussion about subtraction, totals, remainders and lots of great practice with good ol' plain counting!


For our Thanksgiving countdown we decided to go a different route. I already miss the number visuals but I'm excited about the different opportunities this chain provides for learning. It gives us a much different visual. My sugar and I pulled out these awesome links we picked up at the dollar store a few weeks ago. She picked the perfect colors! We decided they were the most appropriate given the season. I then asked her if we could use these colors and shapes for making a pattern. She was so excited to do so and quickly choose the unit. We continued with the unit until we reached the appropriate number of days left. Now everyday when we take a link off our chain we get the chance to work on our colors and shapes as well as review patterns. I can't wait to see where our future countdowns will take us.

Do you have different idea for a countdown chain? Maybe one you and your kiddos have used? I'd love to hear! We'll be getting our Christmas countdown together before we know it! :)


Wednesday, October 16, 2013

Fall Edition of Red Light, Green Light!


Fall is my absolute FAVORITE season for so many reason, one being the enchanting colors of the turning leaves on all the beautiful trees. I LOVE trees!!!

The kiddos and I were outside enjoying a game of “Red Light, Green Light” when I glanced at the red leaf my sweet 7 month old was exploring…perfect! RED LEAF, green leaf!


I explained the game plan and we grabbed the leaves! It was a super easy way to switch up the game and use our sense of sight rather than hearing. 


Even my 2 year old had a blast switching the leaves one at a time from behind his back. Gosh he’s such a cutie!

If you give it a try let me know how it goes!! You could even add a “slow down” yellow light/leaf! We may have to try that next time. 

Thursday, September 19, 2013

Bubbles, Bubbles Everywhere!


It was a just because kinda bubble playing day! I’ve been wanting to get some materials together for some fun with bubbles all summer and finally pushed myself to do it before the season was officially over. It was a great tribute to a fantastic summer!

There are so many recipes out there on the internet for homemade bubble solution and being that this was my first attempt I was pretty nervous about it. Many recipes called for Glycerin which would have required a special trip to a drug store or cake supply store and with my 3 lil ones I really just didn't have the time. So I crossed my fingers and went with the recipe that called for light corn syrup. It was so easy for me to just grab when grocery shopping and it turned out PERFECT! Here’s what we did:

You’ll need:

  • 5 gallons of water (I used regular ol’ tap water)
  • 8 cups of dish detergent (I used a mix of dawn and dollar store brand)
  • 2 cups of light corn syrup

That’s it!!! How easy right?!?! I combined the solution outside since it was going straight into the small play pool. I went with the water first and then added the 8 cups of dish detergent and 2 cups light corn syrup. I used my hands to gently rub the bottom of the pool in efforts to incorporate the ingredients without creating suds. Many sites suggested letting the solution sit overnight for the best results. I wasn't able to do so and put the solution together about 2 hours before we begun our play and I have to say, after playing with it all day, for three days straight, it was perfect from the start! Thank God!

I purchased the majority of our bubble tools the dollar store; pipe cleaners, large bubble wands, individual bubbles, and nets (for butterfly catching). Some of the things we already had were the small play pool, hula-hoop, step stool, drinking straws, yarn, water bottles, rubber bands and an old pillow case.

Before we ventured outside I let the kids use the pipe cleaners to make different shaped bubble wands. They really enjoyed that! Even though there were an abundance of tools to choose from they still enjoyed using the small pipe cleaner wands they created. <3


The nets were TONS of fun! I’m so glad I decided to grab them. They initially used them to run around chasing and catching bubbles of all shapes and sizes until day 2 of playing with the solution when they discovered suds! They used their nets to scoop up the suds from the pool and swing them around and around…it was love at first sight…tiny suds floating through the air and landing everywhere. It looked like snow! Really, it was beautiful!


If I had to choose my favorite experience with the bubbles it would have to be watching the kiddos use the most inexpensive tool of them all…the yarn and straw tool.


Using the hula-hoop to create large wonky looking bubbles and trapping each other in them comes as a very close second! I saw these bubble tools with straw and yarn at One Charming Party. These things made the most incredible bubbles! Four out of five of the kids playing were five and under and these tools were super easy to manipulate and created jaw-dropping bubble results!


We also made some sudsy snake makers by cutting a water bottle in half and wrapping it with parts of a cut up pillow case. I gathered the fabric at the mouth of the water bottle and secured it by wrapping a rubber band around it. With everything else to choose from, these weren't such a hit but did come in handy when the kiddos needed more suds to scoop up with the nets. Beware, they more than likely will get suds very close if not in their mouths.

Check out brother and sister enclosing each other in HUGE bubbles! It was SO awesome!


I really enjoyed watching them explore and learn through play. It was more fun than I could have ever hoped for! All in all it was an absolutely perfect bubbly play-day and I can't wait to make it an annual event!

Monday, September 9, 2013

Rainbow Rice


We finally took the time to dye our sensory rice and make “new” rainbow rice! We have been experimenting lately with color mixing (which has been TONS of fun) so this fell right in line. I Googled and searched for the easiest way to accomplish this and I am so glad I came across the hand sanitizer version opposed to using stinky vinegar, it was super simple! I prepped everything and experimented with the first batch (red) after the kiddos were in bed. I have to say, it was SO hard for me to practice restraint and not finish ALL of the colors! I just knew how beautiful they would all turn out and REALLY wanted to see the final result. I'm glad I didn't give in because upon waking, the kiddos were very excited to see what was in store for them! 

Here’s what we did and what you’ll need:

  • Food coloring (We used the gel food coloring. I also have the neon liquid food coloring and I was curious to find out how vibrant those colors turned out. Next time we’ll try those. I’m sure any liquid food coloring would work. I couldn't tell you exactly how much gel coloring I used, I just squirted a bit till I felt it was enough. If I had to guess I’d say it was about a teaspoon. I do think I could have used more.)
  • Hand Sanitizer (2 pumps per batch/color)
  • Jars (We used an old plastic peanut butter jar and a plastic tuberware container. Glass jars or even bowls, if you prefer stirring over shaking, would work as well. I’m glad we went with plastic because there was a bit of banging on the counters that was needed to get everything mixed together)
  • Rice (I used about 2 cups of rice for each color)
  • Foil, wax, parchment, or even just paper towels for laying out the rice to dry.

Process:
I chose to keeping the food coloring and hand sanitizer squirting to myself and let the kiddos use a measuring cup to scoop one cup of rice at a time into a funnel sitting in the jar. The rice poured right on top of the sanitizer and coloring then we popped the lid on and did lots of shaking and banging. It did take quite some work to make sure the color was dispersed but it was well worth it. Once the kids decided the color was perfect they poured it into sheets of foil to dry. That was it! It was a super easy, kid friendly project that will provide for HOURS of fun!


They were so excited about playing with the colored rice THEY made. Did we get rice everywhere?? Absolutely!! But its not any different than our normal everyday messes and to see the pride they took in their work was all worth it! :)


A few notes:
It doesn't take long at all to dry, especially if you spread it out well. Ours dried within 30 minutes.
I did find 1-2 small clumps of gooey rice and food coloring clusters that I just tossed.

I followed ROY G BIV when laying them in the large bin. 

Whether we play inside or out with our sensory rice (or any other sensory material) I always lay a large sheet down to catch the run-a-ways. I’ve learned the hard way that sensory play is much more fun when we’re (ok I'll admit…when I am) not worried about the huge mess it’s going to leave behind. :)

My favorite thing about this beautiful sensory rice is that it's a keeper! I can use it for future discover bottles, I spy bottles, Carisa's ABC Find It!, art work and what ever else our little hearts see fit for it. I promise you too, will find it well worth your time. Have fun! 

Wednesday, September 4, 2013

YIKES! My Very First Post!!

Its a bit nerve racking not knowing where to start when you decide to begin so I finally just decided to start here…with a day in our life. Here’s what we learned today in pursuit of becoming life long learners.

Let’s start with me…
I learned that a little mocha ice cream, wellllll…ok it wasn’t a little, it was actually a large... can have quite an effect on a nursing momma who barely has any caffeine! I thoroughly enjoyed my large mocha ice cream around 7:30pm and I’m still on my “high” at 11pm. I have to say I’m really enjoying it though :)

I learned or rather was reminded today as I am everyday, that I make mistakes. I’m learning that the more I pray and talk to my Jesus throughout my day the better my day gets. And really, what better way to be an example to my precious little ones than to show them what to do when we make mistakes…PRAY, pray through those hard times and show them that we are all human. Show them that we all make mistakes and that we can’t do this without Jesus’s help. Show them how to ask for forgiveness and then try not to make the same mistakes again. I want to be an example to them. I want them to see Jesus in me. I want to be better today than I was yesterday and better tomorrow than I was today. Jesus is helping me with that.

The scripture that stood out to me in my study today was…
Philippians 2:13 For God is working in ME, giving ME the desire to obey him and the power to do what pleases him.

This scripture spoke volumes to me! I am reminded that I am a work in progress.. I know God has great plans for my life and although I may plan for our day’s activities I pray that HE orders my steps and that HIS PURPOSE prevails! (Proverbs 16:9 and Proverbs 19:21)

What my kiddos learned today…
We worked on our letter K activities that we should have finished last week. Here it is FRIDAY of the following week and we are still trying to finish it up!! That is what having a 3 year old, 2 year old and 4 month old will do to plans...oh geese! But I’m learning that’s OK and would love to share more about that soon. Anyway, I’d say that we were pretty successful today most importantly because we were having FUN learning!

The kids traced letter K’s with their choice of paint and q-tips. We cut, glued and made a mess! In my opinion making a mess is always considered success when you have little ones! We also played in a rice sensory bin while looking for items that begin with the letter Kk.

While I worked with lil man on the vocabulary “big” and “little” big sister cut up number cards 1-20. We took those number cards to our glass coffee table and placed them on the tiles beneath the glass. This intrigued them as they could look through the glass to find and pick the number that came next. We placed the numbers in the correct sequence on the top of the glass surface. It was a pretty neat activity and I’m most positive I’ll use this strategy again for other activities! They enjoyed it and so did I! I told them it felt like we were shopping for numbers!
image
The printable you see here is from Carisa’s amazing website  1plus1plus1equals1. I encourage you to take a look at all of her amazing FREE material. She has really blessed my life.

Lastly I hope the kiddos learned a bit more about how immensely I love them.

Sunday, September 1, 2013

A Little About Me...

I am honored to be the mother of three amazingly beautiful children and the wife of an incredible man. I am on a journey to be the very best mother and wife that I can be for my family. It is my passion to foster a love for learning in my children. I want learning to ALWAYS be an experience for them. I pray that God uses and equips me to help create those experiences for them. I want them to touch learning, feel learning, smell learning...I want them to experience learning, to become passionate about it and to fall in love with it. I want them to be hungry for knowledge, to crave it.  I pray through these learning experiences they are driven to become lifelong learners. I pray that their desire to learn never ceases. We are in pursuit. 

You will probably hear me say many times that I am such a work in progress. I consider myself perfectly imperfect and flawed in every way. Without my Jesus I'd be nothing short of a huge mess! I do NOT have it all together although it may seem so on the outside. I try hard to keep things but crumble quickly realizing I need to give that job up to my Jesus. He can handle me and my worries, anxieties, fears, imperfections...my mess, much better than I can. 

I wanted to start a blog for a few reasons. 


  • Although I have three precious little ones I am fairly new to being a SAHM (stay at home mom). I am SO blessed to have this opportunity and give God all the honor and glory for making it possible! He has provided my husband with a wonderful job and an incredible drive to provide for his family. My husband amazes me. He wants nothing more than the best for us and will stop at nothing less to provide it. He is such a hard worker. God has blessed him with great talent and he is exactly where he should be, using his God given gift everyday! The scripture 1 Peter 4:10-11 reminds me of him…”Each one should use whatever gift he has received to serve others, faithfully administering God’s grace in its various forms. If anyone speaks, he should do it as one speaking the very words of God. If anyone serves, he should do it with the strength God provides, so that in all things God may be praised through Jesus Christ. To him be the glory and the power forever and ever. Amen” (NIV) 
  • I don't want to loose a millisecond of the memories God has given me with my babies! I know this blog will be a place where I can, not only share our experiences with others but help me document this monumental time in our lives . 
  • I want to be real. I want God to use me. I want this blog to be a place where his presence flows. A place where, although my fingers do the typing, HE does the speaking. It is my prayer that through my sharing God can speak, touch, heal, restore, revive, refresh, and encourage other moms. 
I have to be quite honest, I have no idea where God will take this or exactly how He plans to use me but what I do know is that's all I want, to be USED...by Him. Whatever talent he gives me, whatever job he assigns me, I want to do it with every fiber of my being and for His glory. So here we go! I'm on a journey. I'm so ready to be taught and to learn. I am in pursuit.